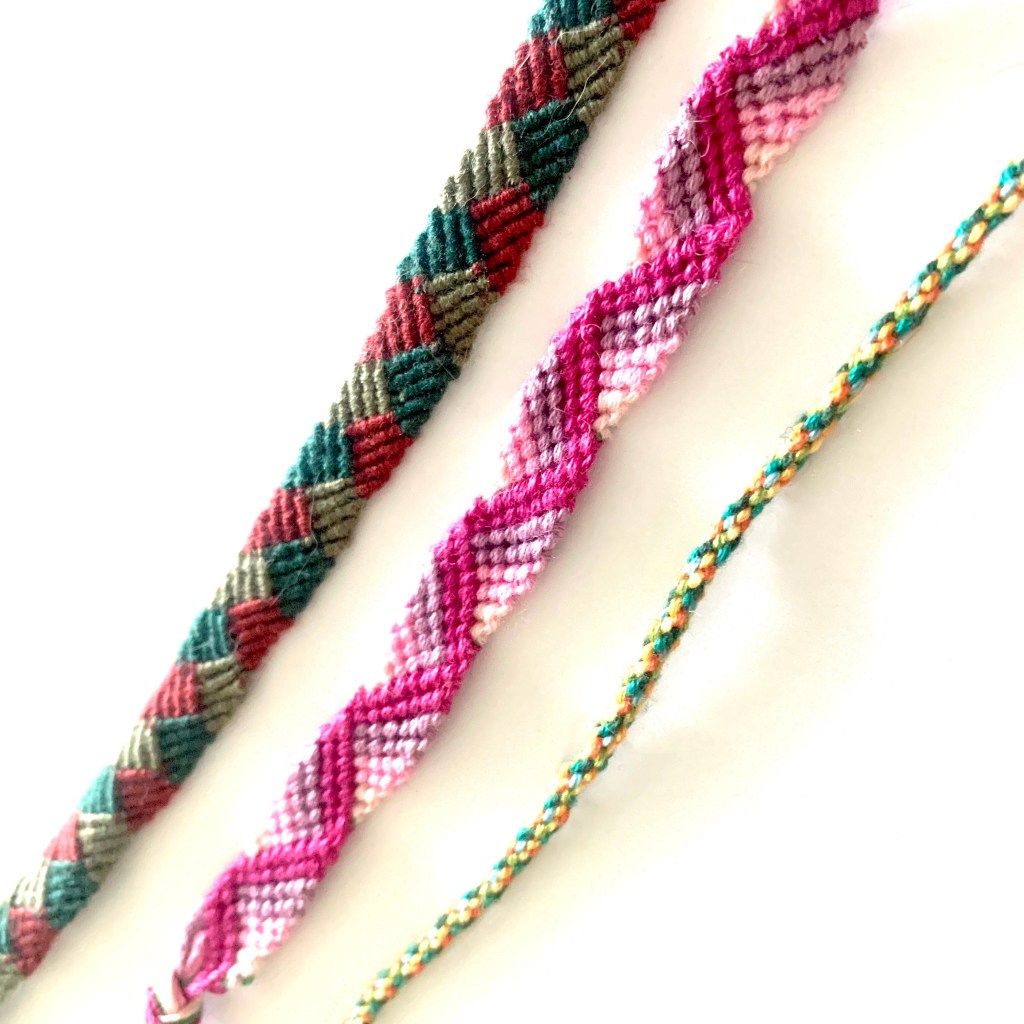
We are in the middle of summer with a lot of free time on our hands, so it’s time to take another look at classic camp crafts. Nothing reminds me more of being a kid and summer than making friendship bracelets, so let’s get some embroidery floss and get moving. Last year I wrote a post about three basic friendship bracelets and recently I covered 3 options for gimp bracelets. For this post I’m going to cover three different types that will give some variety to the classics we’ve already covered.
Braided Friendship Bracelet
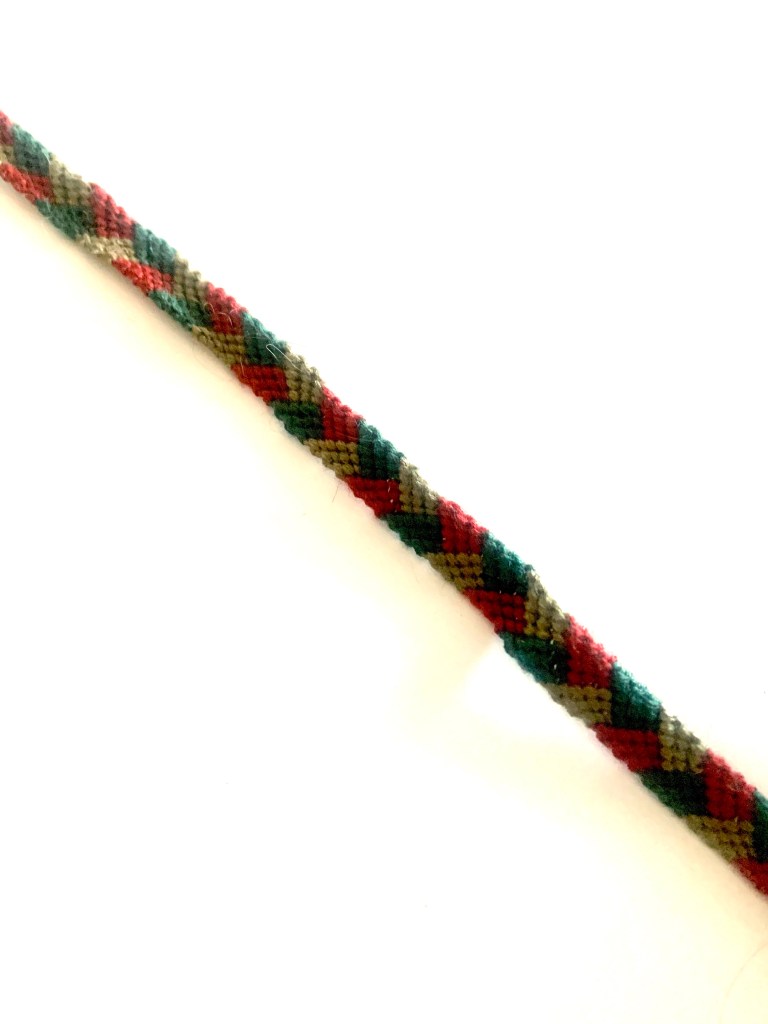
For this bracelet you will need 9 pieces of string, 3 different colours. Group the strings together by colour. Remember to tape or pin down before you begin.

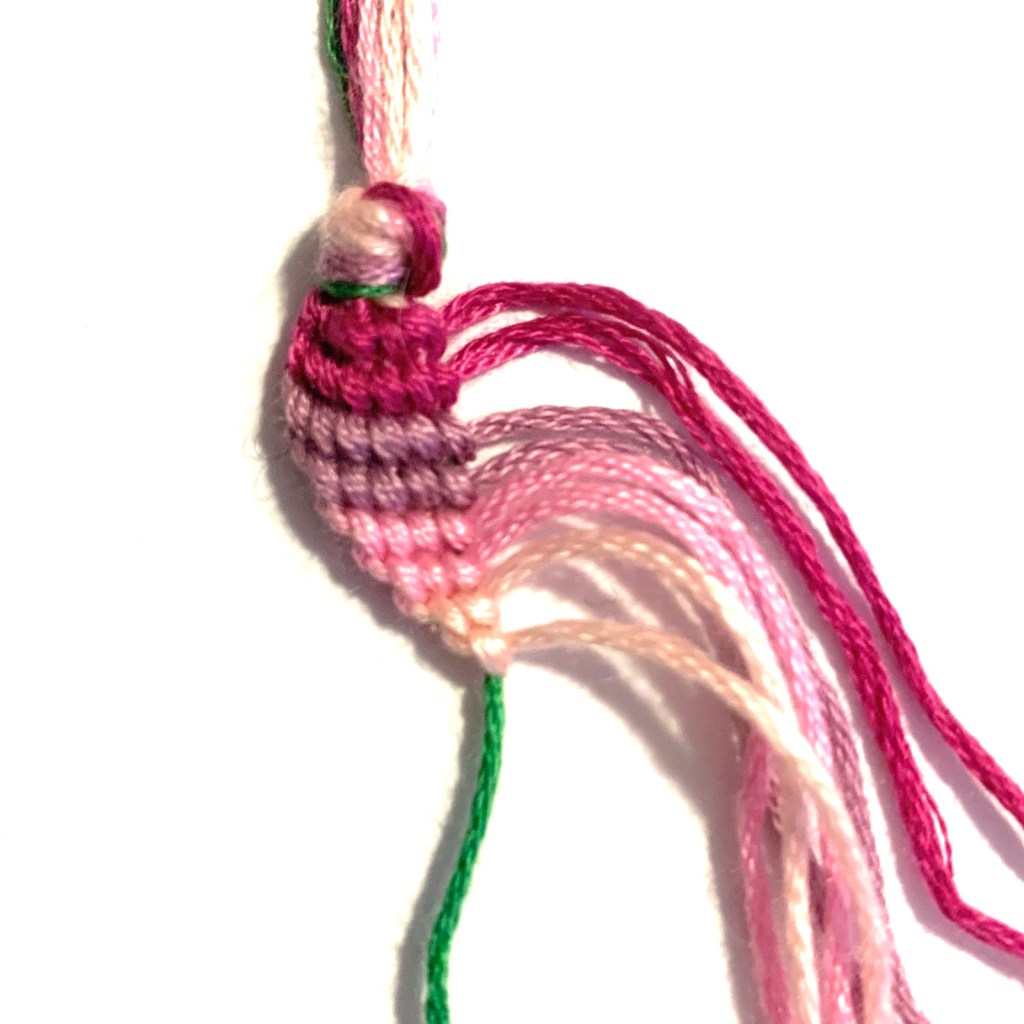
This bracelet will be made in sections. To make a green block as seen above, you will make your forward knots on the green and the red strings. The knots are the same as in the original bracelet post, make a 4 over the second string and pull the first string through from behind. Do that twice on each string. Start with the far left string and make your way across until you finish the reds.

Once that first string has made it all the way across, group it with the dark greens. Take the new far left string and go across the remaining green and the red strings. Do not tie knots on the green string you’ve already finished.
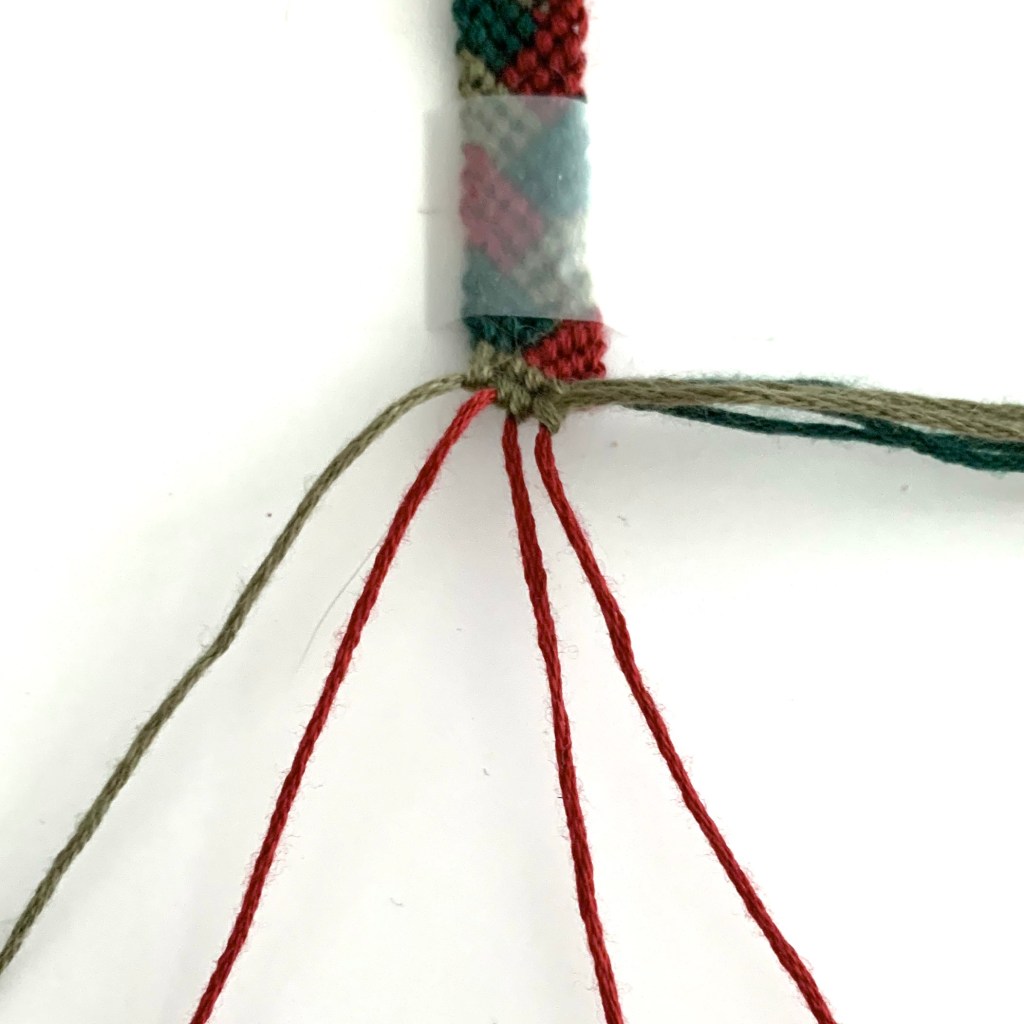
Once the green string is done put it to the side with the other green string and dark green strings. Finally take the last green string and tie knows across the red strings. That finishes the green colour block.

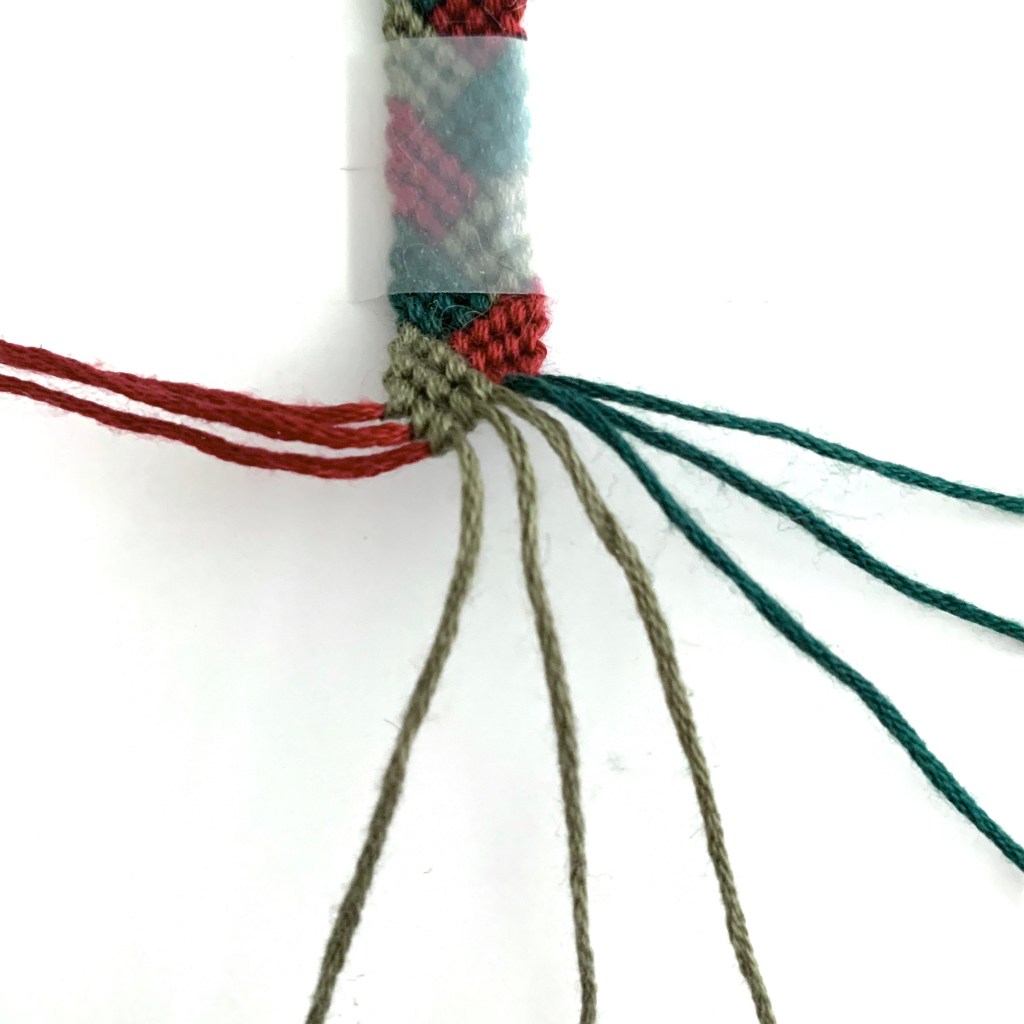
Now to start the dark green section you will the same thing in reverse. This time the red strings are moved to the side and you will make knots across from right to left. The knots for this will be the same just with a backwards 4 set up like in the chevron from the basic friendship bracelet post.
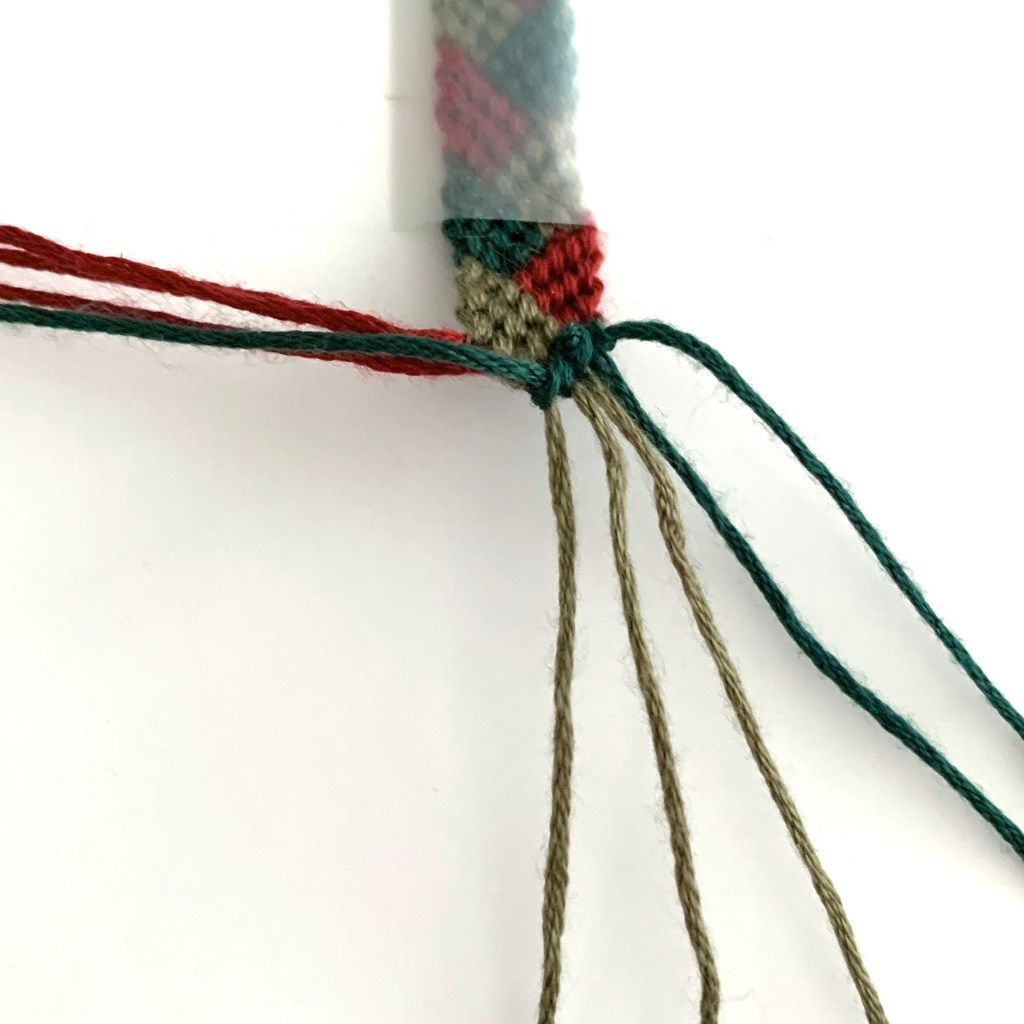
Same as with the green section when you are done a dark green string it gets put aside with the red.
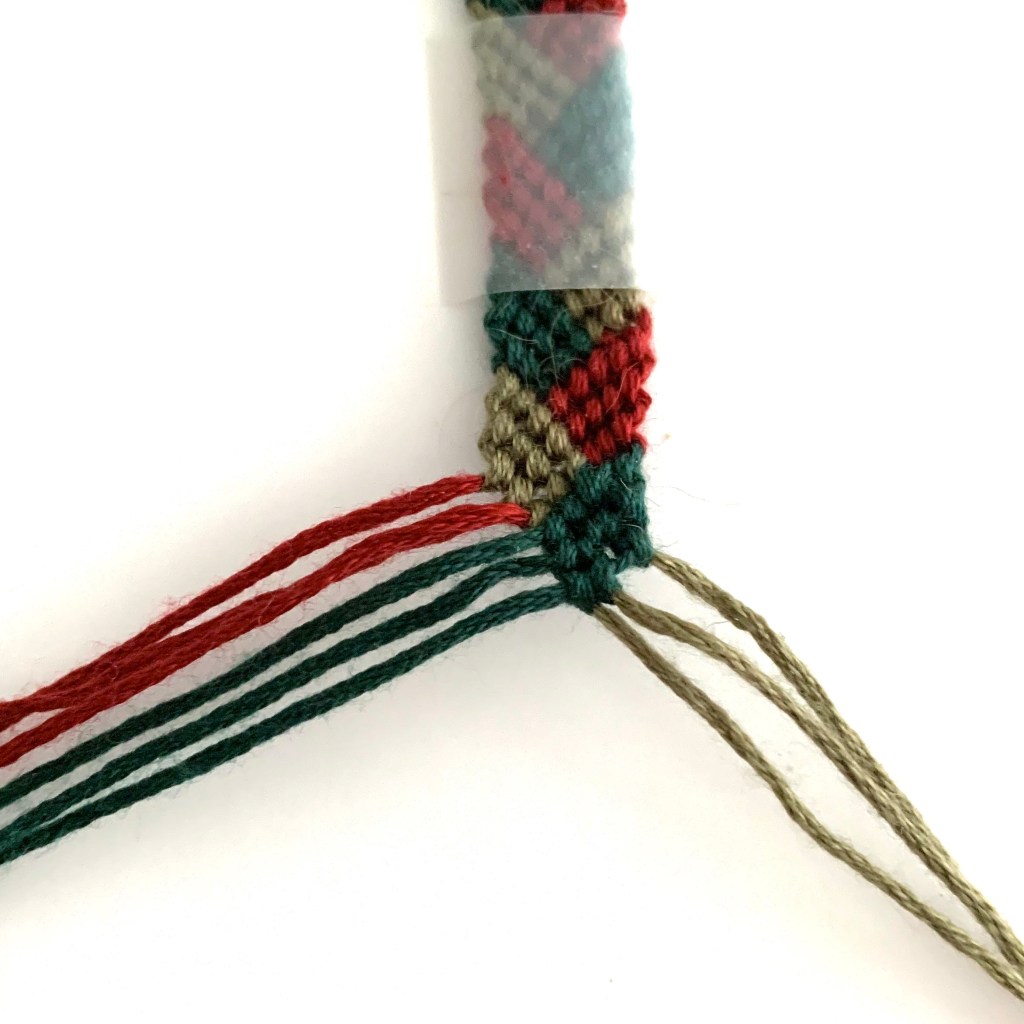
When you are done the dark green colour block you able to start the red section by pushing the green to the side and knotting from left to right again. This is way you alternate until you reach the desired length.
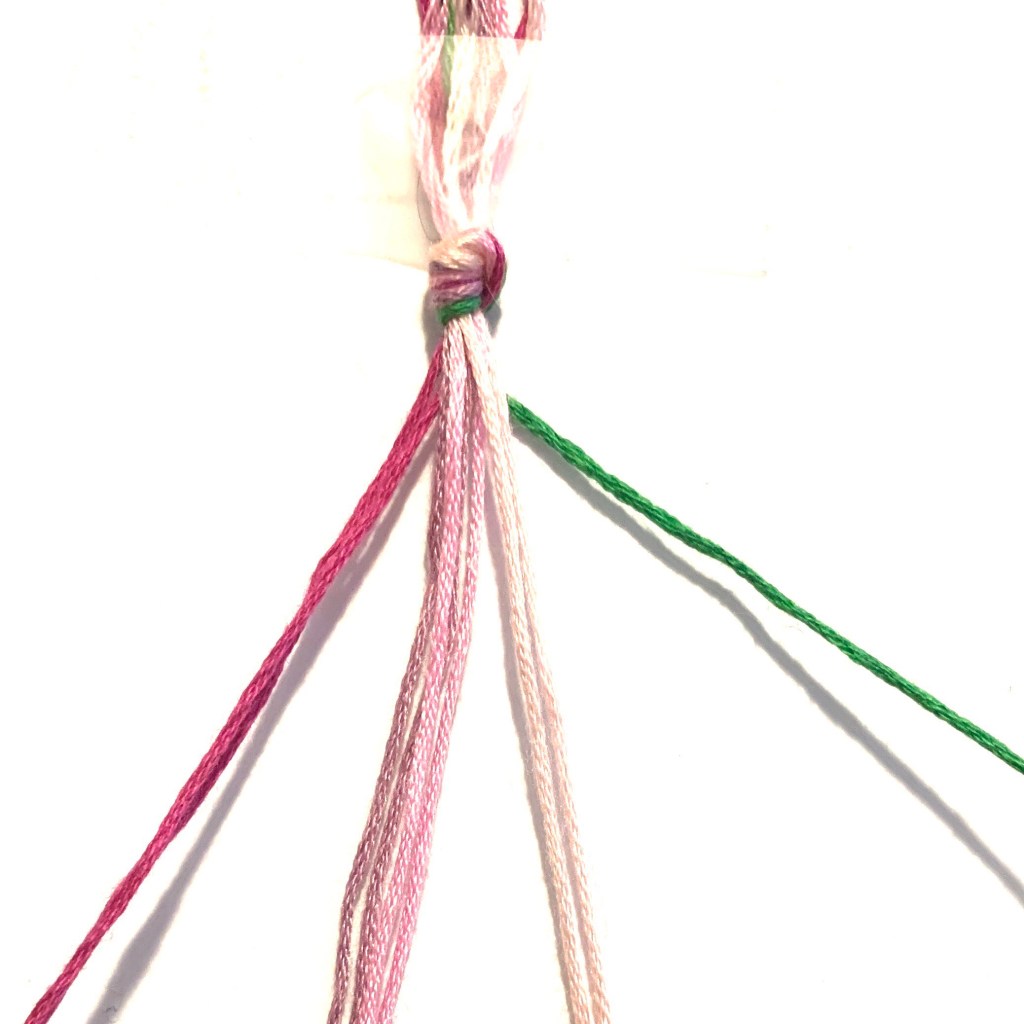
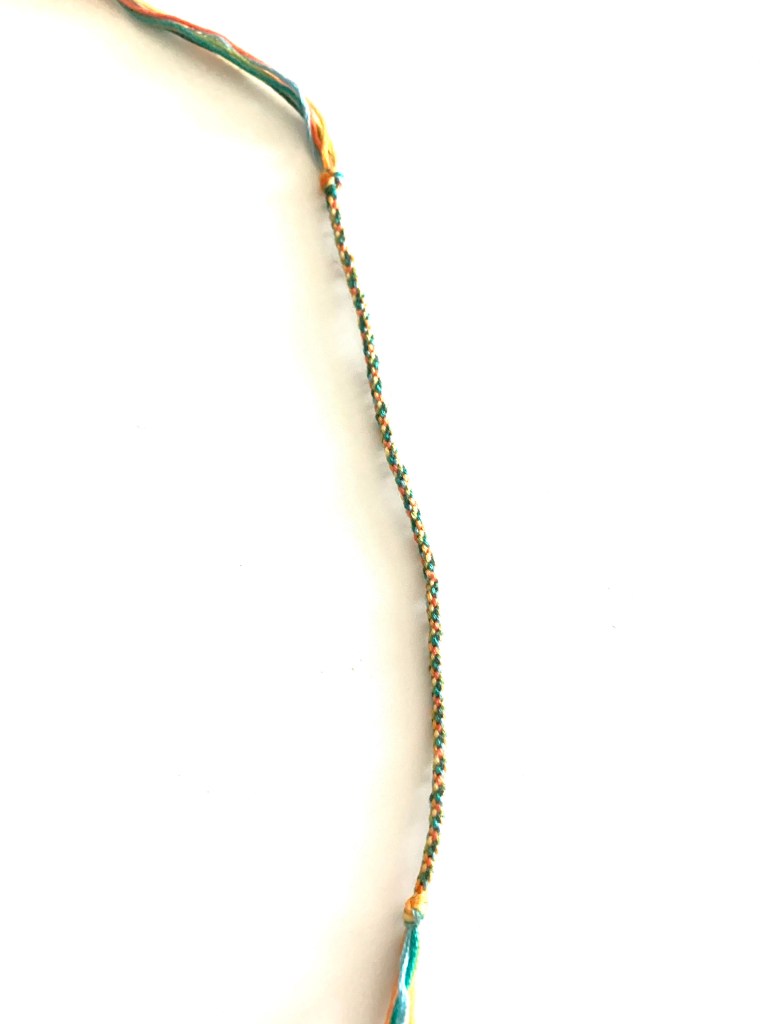
Ribbon Bracelet
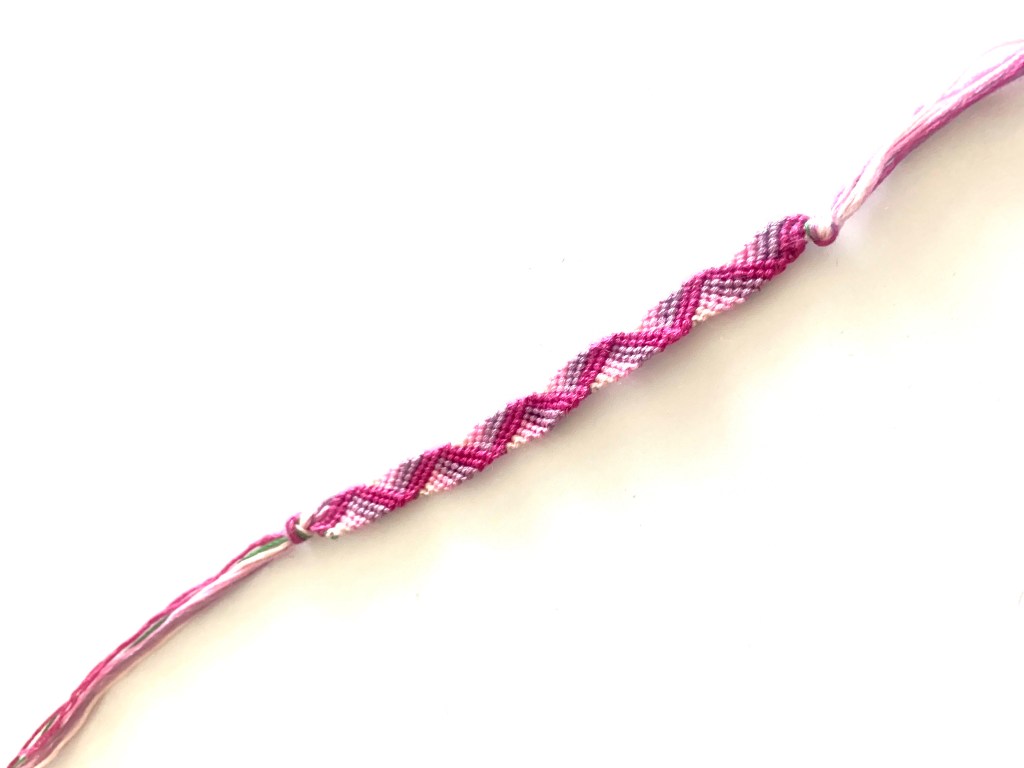
For this bracelet you will need 9 pieces of string. 4 sets of two colours and one string, colour doesn’t matter you won’t see that one.
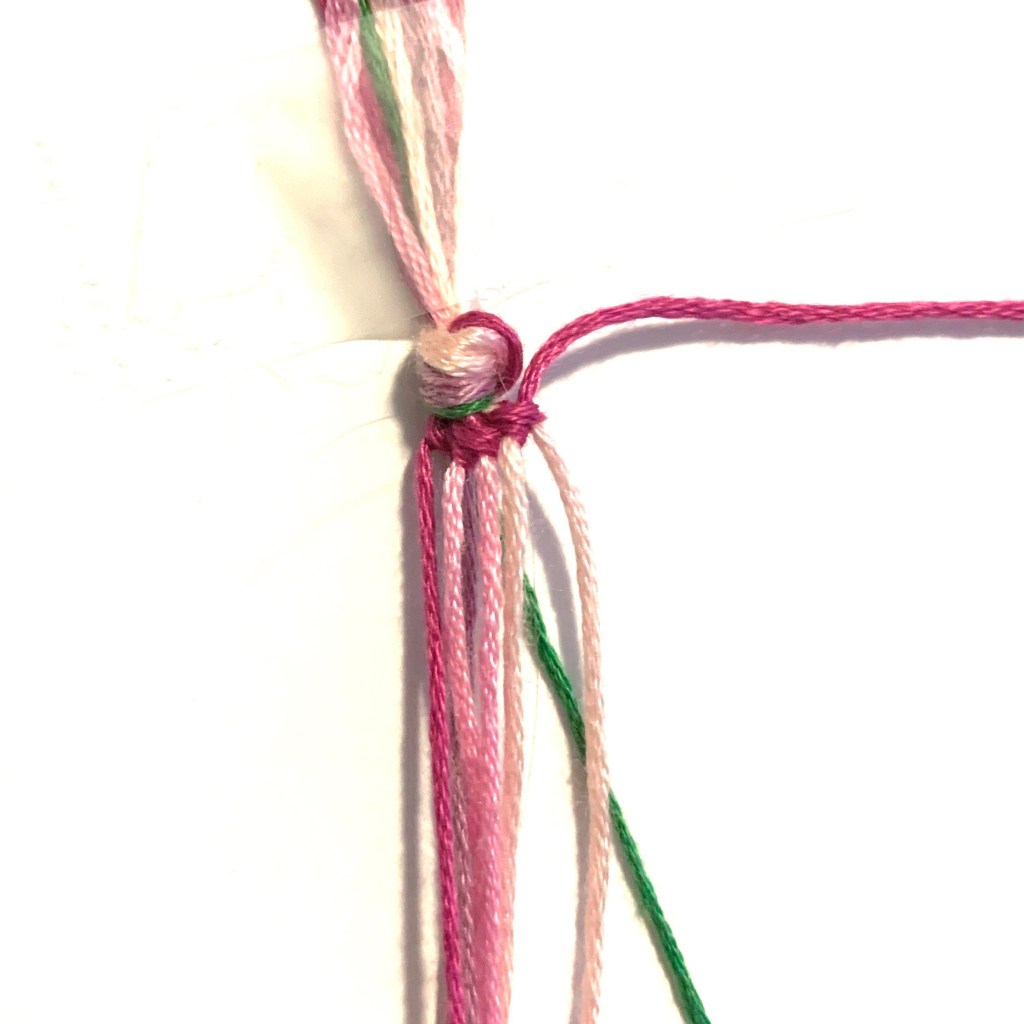
Start with the first colour on your left, and do two knots on each string across, then set that string aside.

For the second row, Take the string that is now farthest on the left and tie across all the strings except the string you had already tied. When the row is complete set the second string aside with the first string.
Continue knotting across with each string, remember not to tie on the previously finished strings and the first section should look like the photo above. The green string will never be tied to anything and therefore will not be seen.

To start going the other way you will do the exact same the in the opposite direction. Grab the string furthest on the right and tie two knots backwards across all the strings then set it aside, repeat with the remaining strings.

Once you finished the opposite direction you are back where you started and repeat from left to right. Continue going back and forth until you’ve reached the desired length.
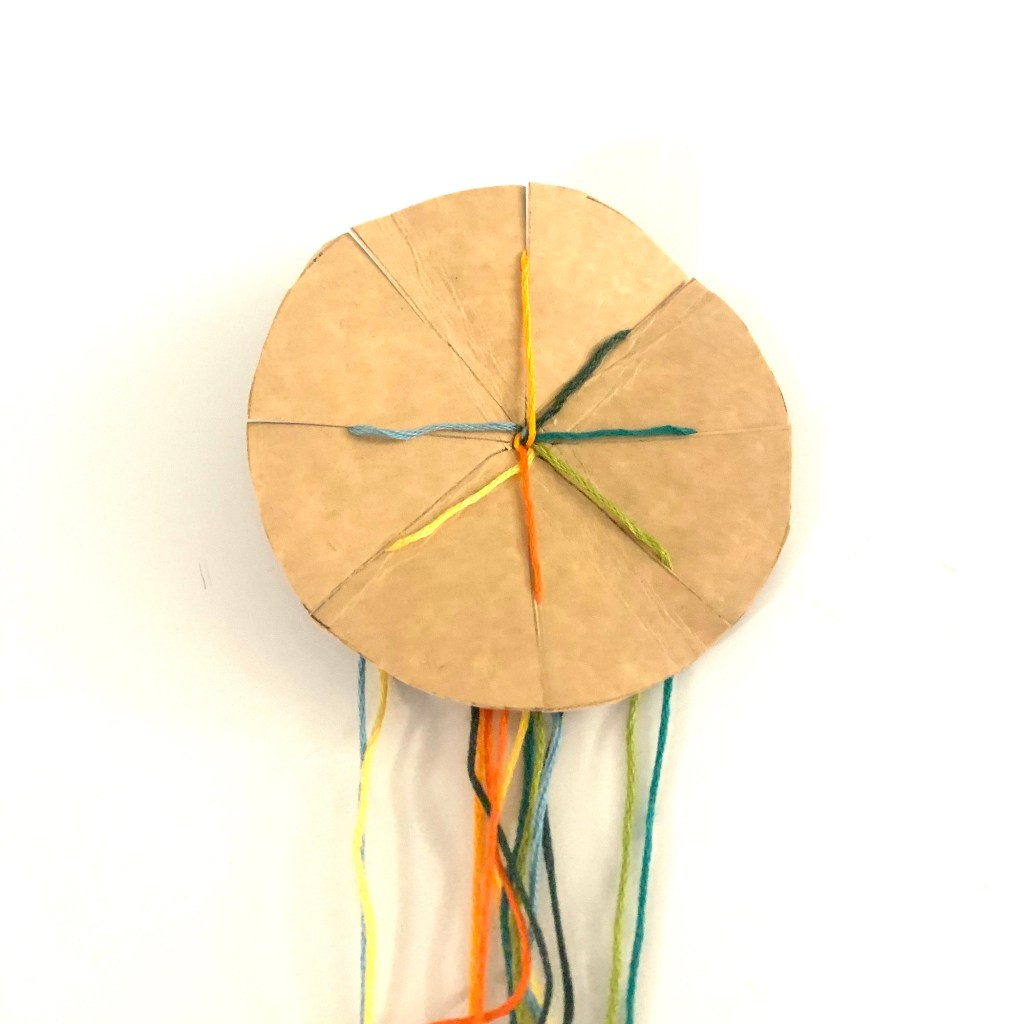
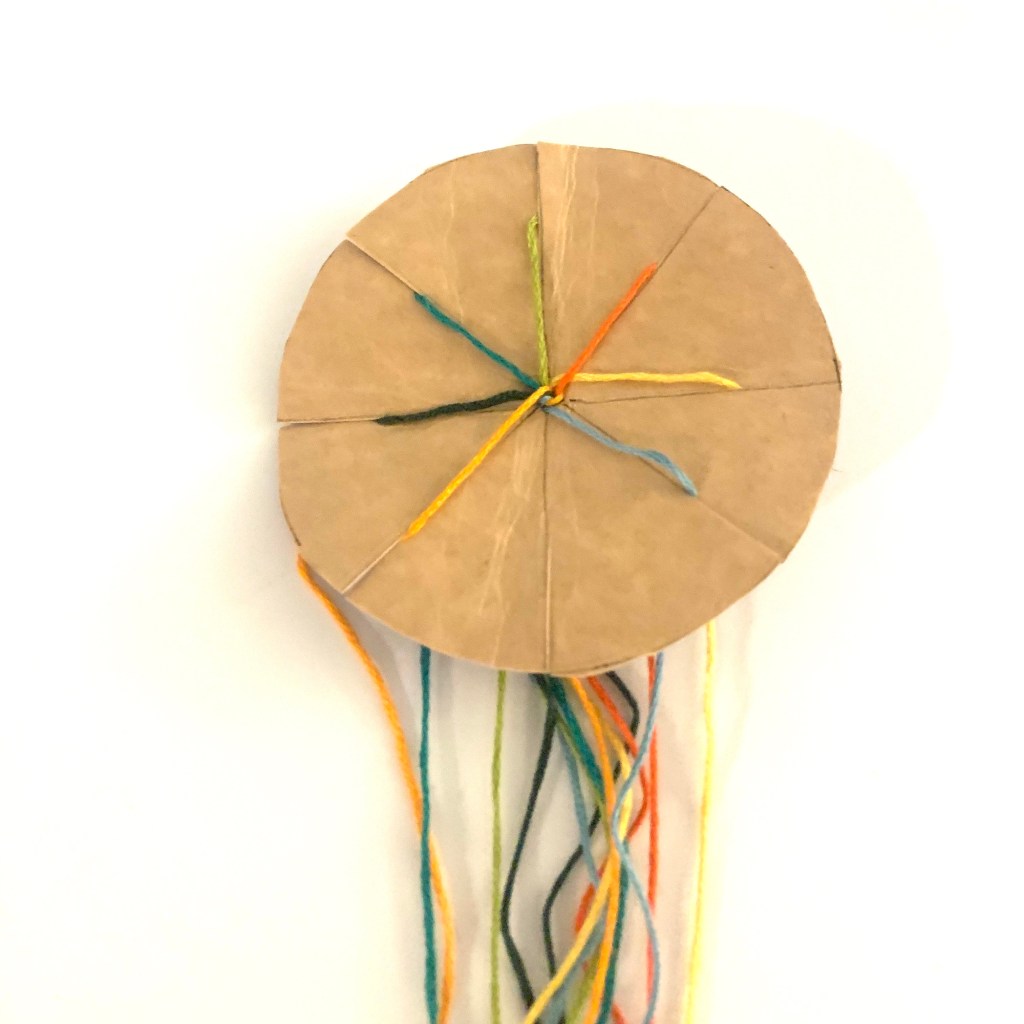
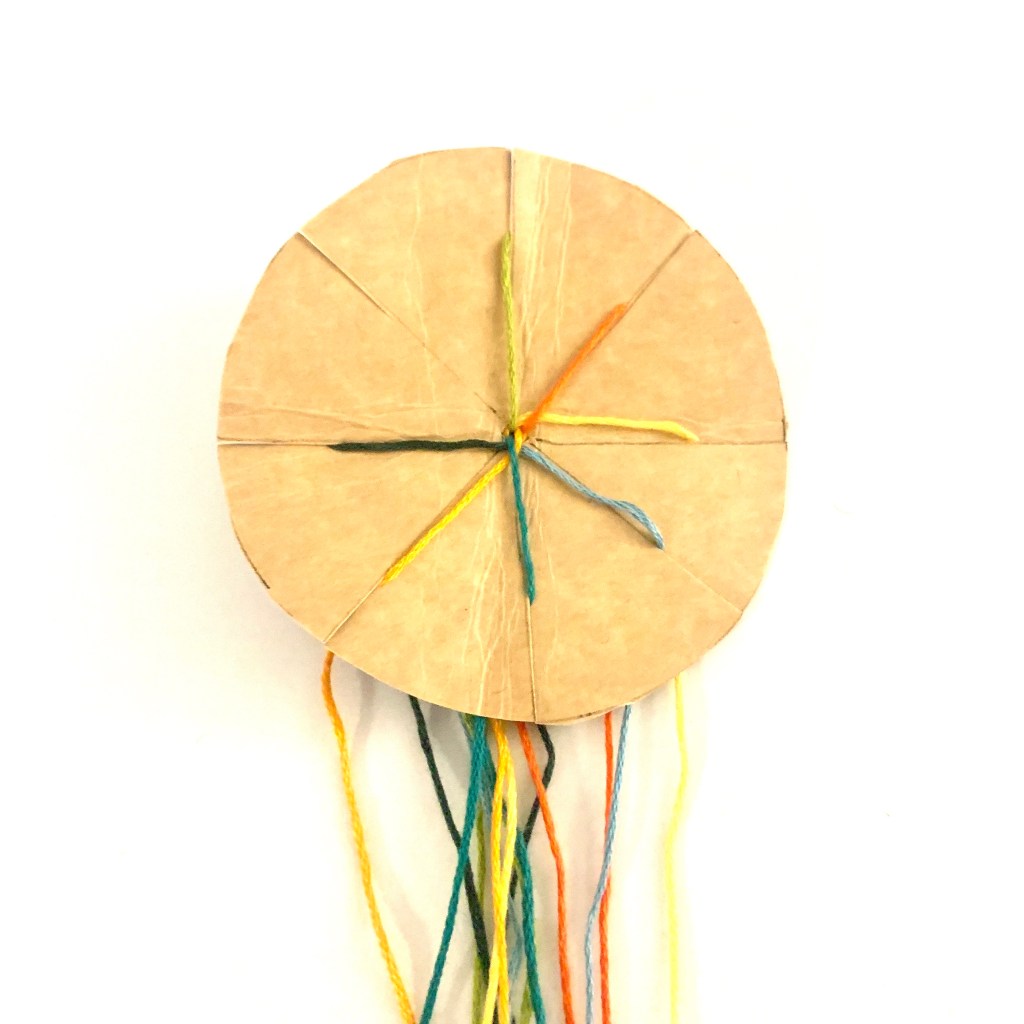
Woven Cardboard Loom Bracelet
This one is set up a bit different, you will need a piece of cardboard and seven pieces of string.

For the piece of cardboard I used the back of a cracker box. Draw a circle outline. Draw 4 lines that intersect in the middle. Cut a small hole in the middle and slits on the drawn lines.
Once the cardboard is ready, pick 7 pieces of string and tie a knot at one end. Pull the thread through the hole with the knot staying on the other side.

Pull a piece of string onto each of the slits of the cardboard, there should be one remaining spot.
Count three strings up on the right side, take that string and place it in the empty slot. Rotate the circle so the new open spot is in front of you, then count up three strings on the right side and move that string to the empty slot. Repeat until the bracelet is the desired length.
These three variations on the classic bracelets are all still beginner friendly. Between these and the original 3 there’s what feels like endless amount of colour and style combinations. You can buy embroidery floss for next to nothing so it definitely affordable and a great craft to do outside in a park or on the go. Making it a summer classic craft for sure.
If you like these bracelets, try some more friendship bracelets:

3 Comments Add yours